


How To "Scrap" That White Apron Look Using The Gel Press: Art Project Tutorial 13
By Lynne Suprock
Its READY, SET, and SEW time for another altered fabric project! This time I am using my awesome new Random Circles Stencil, from MaryBeth Shaw and Stencil Girl Stencils. I chose the circle stencil because I have a love affaire with circles going on right now...and these random circles do fill my heart...

In fact, one of the real inspirations for this fabric project was an awesome watercolor, purchased from artist, Stacha Prazak Conboy.

Using the circle stencil, some acrylic paint, oil pastels, a 10 x14 Gel Press gel plate, and a little extra fabric, we can transform this plain craft store apron into an artsy-fartsy, coloricious, fabuloso statement piece with a little motion. Can you feel the yum as all this tactile and visual heaven come together?
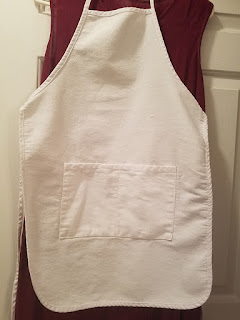
Okay, so, this was a basic box apron with lots of white... lot's and lot's of white! Let's see how we can fill in some of this vast open white space to make it....well, more appealing to the eye!


Step one: Pick a few color combos of acrylics. Mix one part paint with one part GAC-900 or textile medium that will enable to make the paint colorfast through washing. Roll the paint onto the Gel Press plate with a brayer.


Step two: Place the stencil over the rolled acrylic, and grab a piece of paper to lift the extra color.


Step three: Lift the stencil to reveal the pattern remaining on the plate. Select an area of the apron and press it onto plate, then smooth so that you pick up the paint underneath.


Step four: YAY! L-O-V-E IT! Now let's pick another color and keep going....


Step five: Etc, Etc.


Step six: Okay Let's add a focal point to the apron. As with the last art share, I used a transparency and inkjet printer to reproduce an image. This time, before placing the wet ink side down, I reversed the writing. Press onto the Gel Press plate and voila......lift. Now its time to place the fabric down and smooth with hand. Lift the fabric. A benefit here is that you can wash the remaining ink from the transparency and reuse it for the next project!


Step seven: At this point let's put away the paint and focus on adding more yum-yum fabrics. I have an old, old, old, fav tee shirt that I tore apart, so I could add it to the length of the apron. A similar tee weight top with lace, was also begging to be a part of this apron party! I cut and pinned the lace ruffles along the bottom of the blue tee, and saved a bit more for the pocket trimming.


Step eight: I wanted to make some of the circles pop, so I pulled out some water soluble oil pastels and started drawing over several of the acrylic ones.


Step nine: For the final touches, it just made sense to add a bit of free motion stitching around some of the circles and, as well, over the tee shirt portion of the apron to bring it all together. Hint: Reinforce the thinner tee shirt layer from behind, with either removable painter's tape or some interfacing, so that you can free motion stitch with ease). In the end, make sure you heat set everything according to directions if you are going to wash the item.


VOILA AND OU-LA-LA. Love how this turned out, don't you?

On a different note, in an effort to marry my fabric creations some of my jewelry designs, I paired my enameled circle necklace with this art apron. Ooooh.... I am sew, sew smitten! xo

Follow me on FB where you can instant message me with any questions. I also have an Instagram page at lynne_suprock
If you like video tutorials, join me for a few on www.youtube.com/user/lsuprock
Stay tuned for the next Segment, with more stories, images, and tips throughout the weeks and months ahead


